Adding a Header and Footer Section to your Gift Card Pro Storefront Pages
Adding header and footer content to your Gift Card Pro builder or balance check page can be done from within the Gift Card pro app dashboard.
To get started, go to Apps –> Gift Card Pro –> Configuration –> Appearance settings.
Here, you will see the option to enter in html, which will load on your storefront.
There are 4 sections in which you can add custom content. The Purchase Page Content Top and Bottom, and the Balance Page Content Top and Bottom.
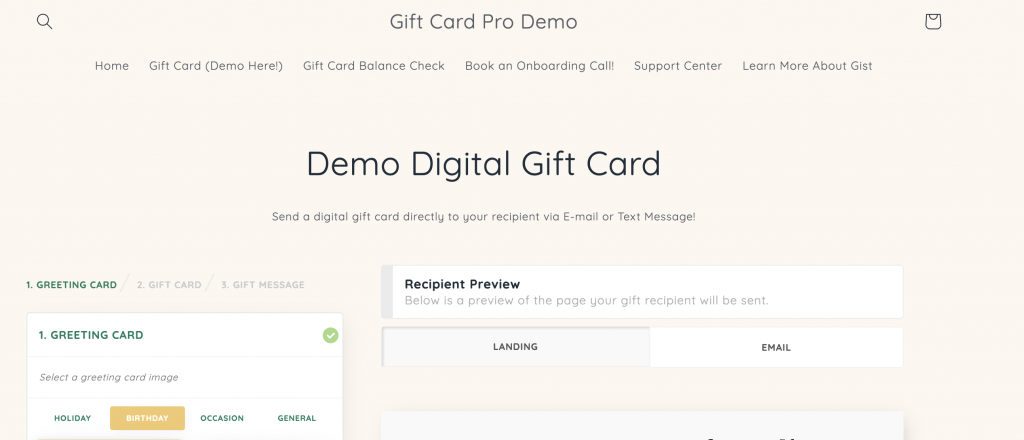
As an example, let’s add header content to the Purchase Page, therefore injecting custom content into the section title Purchase Page Content Top.
The following code:
<div style="text-align: center;">
<br><h1>
Demo Digital Gift Card
</h1>
</div>
<div style="text-align: center;">
<p class="gcp-header">Send a digital gift card directly to your recipient via E-mail or Text Message!
</p>
</div>
<br>
Will output this:

Using a combination of HTML and CSS, you can add any type of content here.
As ever, please don’t hesitate to get in touch if you require any assistance at support@gist-apps.com
Can't find the answer in our documentation?
Contact Support Hide the Price Summary Section on the First Step of the Gift Card Pro Builder Form
Adding a Header and Footer Section to your Gift Card Pro Storefront Pages
Skip the First (Choose A Design) Step of the Gift Card Pro Builder Form
Centering the Gift Card Pro form on your Storefront
Updating the Fonts Used by the Gift Card Pro on your Storefront
Preventing “Hidden” Line Item Properties from Displaying on Your Store
Adding a Gift Card Terms and Conditions Page to your Online Store
How to Clear the Gift Card Pro Form After a Gift Card Has Been Added to the Cart
Using CSS Overrides to Change the Design / Layout of the Gift Card Form
Add a Thumbnail Image to the Gift Card Product That is Added to the Cart